- Home
- How To Do It . . .
- Build A Screen Room
Build A Screen Room
Framing Your Screen Room
A Screen Section can be installed between a wall and a post, two posts or two walls. You must have a flat surface to attach all four sides of the screen section.
Planning
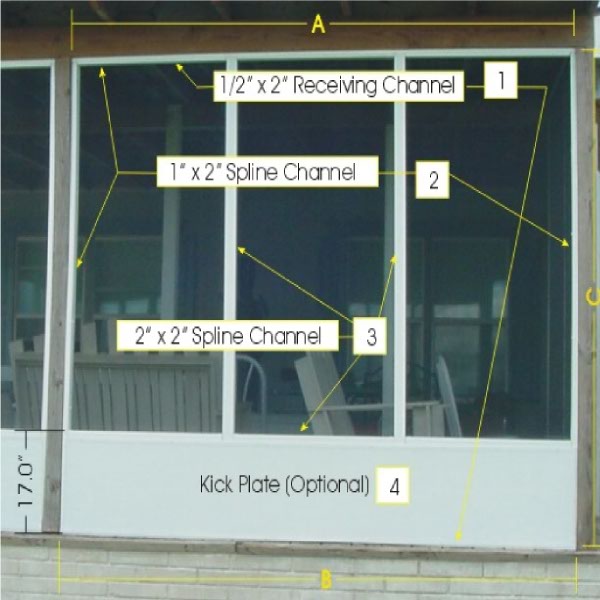
(2) The Screen Section is divided in equal sections by the vertical 2" x 2" Spline Channel. Each divided section can be any width up to 4" less than the width of your screening. The screening material must overlap each side by at least 2 inches.
(3) The Kick Plate is optional. If you install a Kick Plate the horizontal 2" x 2" Spline Channel can not be higher than 17" so that the 16" Kick Plate can attach to it. If you do not use a Kick Plate, you can install the 2" x 2" Spline Channel at any height to use as a chair rail.
(4) If you are going to install a screen door, you must create an opening between vertical Spline Channel. The opening must measure 36" x 81" for a 36" screen door.
Step #1 : Installing the Receiving Channel
 ( 1)Measure the top of the Screen Section (Distance A) and cut a piece of the
1/2" x 2" Receiving Channel to fit. Measure the bottom of the section (Distance B) and cut a piece of the 1/2" x 2" Receiving Channel to fit.
(2) Drill a 3/16" hole, 4" from one end of each piece of Receiving Channel, in the middle of the 2" side. Drill holes every 2 feet ending about 4" from end.
(3) Install Top Receiving Channel using 2" Hex Head Screws. Install Bottom Receiving Channel using 2" Hex Head Screws or 1-1/2" Tapcon Screws for installation on concrete.
Step #2 : Installing the 2" x 2" Spline Channel
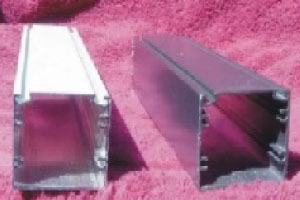 (1)The Screen Section is divided in equal sections by the vertical 2" x 2" Spline Channel. (See #3 in the Screen Room Picture at the top of this page) Each divided section can be any width up to 4" less than the width of your screening.
(2) Measure from inside the Top Receiving Channel to inside the Bottom Receiving Channel. Cut the 2" x 2" Spline Channel to fit.
(3) Insert the Spline Channel into the Bottom Receiving Channel at the desired location, making sure the Spline Groove is on the proper side. Insert the Spline Channel into the Top Receiving Channel. Using your Level make sure the Spline Channel is vertically level. Attach the Spline Channel to the Bottom Receiving Channel with two 9/16" Hex Head Screws and to the Top Receiving Channel with two 9/16" Hex Head Screws.
(4) Install the rest of the 2" x 2" Receiving Channel dividers using Steps #1-2-3 above.
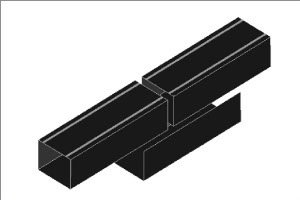 If the 2" x 2" Spline Channel Post need to be longer than 8 feet, you will need to use a Splice Support.
Butt the two 2" x 2" Spline Channel pieces together inside the Splice Support with the spline groove facing up. The shortest piece must be 12" or longer.
Using 5/8" Hex-Head Screws, equally space the screws on each side of the Splice support, six screws to a side.
Install the post with the Splice towards the top of the screen wall with the Splice Support at least 3" below the top of the post.
Step #3 : Installing the 1" x 2" Spline Channel
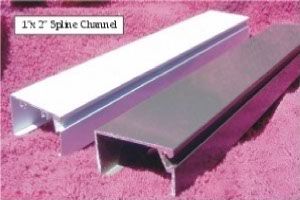 (1) Measure left side of the Screen Section (Distance C) and cut a piece of 1" x 2" Spline Channel to fit.
(2) Drill a 3/16" hole, 4" from one end of each piece of Channel, in the middle of the 2" side. Drill holes every 2 feet ending about 4" from end.
(3) Install Spline Channel using 2" Hex Head Screws for wood or 1-1/2" Tapcon Screws for concrete, brick or rock.
(4) Install 1" x 2" Spline Channel on the right side of the Screen Section opening using steps #1-2-3 above.
(5)Measure between each installed Spline Channel section at the top and at the bottom.
(6) Cut a section of 1"x 2" Spline Channel to fit and insert into the top Receiving Channel and the bottom Receiving Channel.
(7) Attach with 9/16" Hex Head Screws spaced about 24" apart.
Step #4 : Installing the Chair Rail
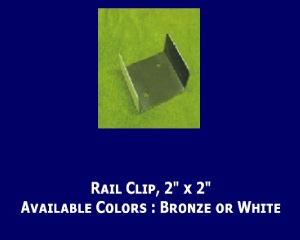 The Chair Rail divides each Screen Section horizontally. It can be any height, usually 24". If you are installing kick plate the Chair Rail needs to be 17" high.
(1)Install Rail Clip on left 1" x 2" Spline Channel with two 9/16" Phillips Head Screws. Install Rail Clip on nearest 2" x 2" Spline Channel with two 9/16" Phillips Head Screws.
(2) Measure and cut to fit a section of 2" x 2" Spline Channel.
(3) Install the Spline Channel between the two Rail Clips as Shown. Hold in Place with one 9/16" Hex Head Screw from the bottom center of each Rail Clip and one 9/16" Hex Head screw in the top center of the each Rail Clip.
(4) Continue installing Chair Rail as needed using Steps
Screening Your Enclosure
 Loading... Please wait...
