- Home
- How To Do It . . .
- Making Window Screens - The Frame
Making Window Screens - The Frame
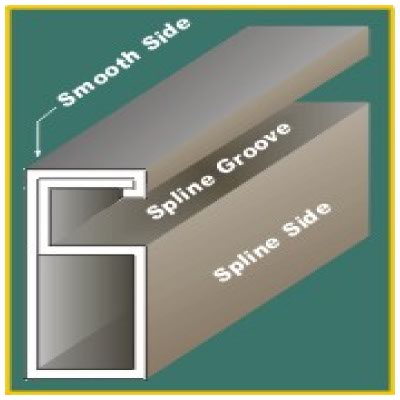
 Spline Groove -- the recessed area where the Spline is inserted to lock the screening in place
Spline Side -- the side of the frame with the Spline Groove
Smooth Side -- the side of the frame without the Spline Groove
Inside each screen frame kit is an assembled frame sample. Take the sample apart. See how the miter cuts are made -- with the spline groove on the short side. See how the corners are inserted -- there is a right way and a wrong way.
To remove one of the tension springs, place the shaft of a screw driver between the screen frame and the tension spring. Press down on the tension spring at it's highest point. The spring will release from its anchor hole. Measure the distance between the holes that hold that tension spring. You will need to drill your holes the same distance apart. Study how the pull tabs and the center bar clips are installed. Understand what holds them in place.
Cutting the Frame
When you understand how the frame is assembled, you are ready to cut the frame to size. Use the philosophy that it is more materially efficient and less labor intensive to measure twice and cut once. Make each cut at a 45 degree angle just like the sample. After each side is cut, re-measure it to be sure it is the correct length.
When the four sides are cut, take the side that gets the tension springs and drill the holes for each tension spring. Space the holes for each tension spring the same distance apart as on the sample frame. The tension springs are usually located about 4" from the corners of the frame. Install the tension springs then assemble the sides using the corner inserts.
Blocking the Screen Frame
You must block the screen frame in place on your work table. If you don't the sides will be pulled out of square and will be bowed in during the screening process.
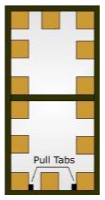
Place the screen frame in position on your work table with the spline side up. Using your square make sure the corners are at 90 degrees. Set a block in one corner. Drive one of the 3/4" nails through the center of the block and into your work surface. Using the same method, block the other three corners. Re-check each corner to make sure it is square. Using the diagram on the right, install your middle blocks. If your screen will not have a center bar, you will still need to block the middle of the screen to keep the sides from bowing in during screening.
The Center Bar
If your screen will have a center bar, measure down from the top of your screen and mark the location of the center bar on both sides of the frame.
The length of the center bar will be the width of the screen minus twice the width of the aluminum frame.
(CB Length = Screen Width - 2(Frame Width)
For Example :
If your Screen size is 36" x 60", then the width of the screen is 36".
If you are using 5/16" x 3/4" aluminum framing then the width of the framing is 3/4". The center bar length is 34.50", the width of the screen (36") minus
twice the width of the frame (1.5")
CB Length = Screen Width - 2(Frame Width) = 36" - 2(3/4") = 36" - 1.50" = 34.50"
You will use the aluminum framing to make your center bar. Cut the center bar with straight cuts -- not miter cuts.
Lay the center bar in position with the spline side up.
Pull the sides of the frame tight against the center bar and measure to insure that the width of your screen in the middle is the same as the width of your screen at to top and bottom.
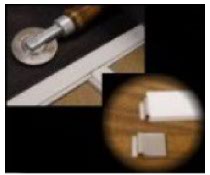
Lift one end of the center bar and insert a center bar clip, being careful to leave the end of the clip exposed. If you push the center bar clip all the way into the center bar it will wedge and can not be removed. Return the center bar to its position on the table, with the end of the center bar clip over the frame in the spline groove. Take the opposite end of the center bar, insert the center bar clip and repeat the installation process.
The Pull Tabs
Place the pull tabs next to the corner blocks, as shown in the diagram above,with the edge snapped into the spline groove.
Now you are ready to begin screening . . .
Screening with Fiberglass Insect Screening
Screening with Aluminum Insect Screening
 Loading... Please wait...

